Before I begin I would just like to say hello to all those who read this blog from the non- Anglophone world.
To those of you reading in Spain, Russia, France, Germany, Poland, Iceland and elsewhere; Muchas Gracias, Большое спасибо, Merci beaucoup, Vielen Dank, Dziękuję and Takk fyrir.
I have received many requests for doing a piece on ‘kuzushi for backwards throws’. This is probably because in my previous pieces on kuzushi I have focused mainly on forward techniques.
If you review those articles you will find several points that transfer across applying kuzushi for forward throws and backwards ones.
The four of the most salient are:
Coordinating both hands to work together
Generating power from the lower body
Applying kuzushi in a continuous manner throughout the technique
No matter how good your kuzushi is it must be combined with; control, positioning and an awareness of and ability to capitalise on, the moment of opportunity.
The central principle I want to convey in this article is that when attacking with a backwards throwing technique it is crucial that you concentrate on attacking the chest. The reason behind this is that attacking the chest means you ideally gain control over the upper body and head and use it to disrupt uke’s balance.
If you take a moment to stand up and conduct a little experiment you will know what I am talking about.
Adopt this posture
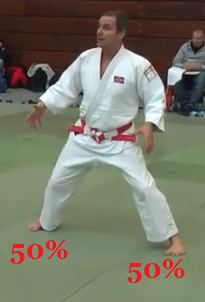
Legs evenly spread head above hips and everything set so your weight is equally distributed.
Now without moving your feet at all, move your head about 12 inches to the right.
You should now feel the majority of your weight concentrated in your right leg.
Now return to the original balanced posture.
Now move your head 12 inches to your rear.
Did you fall over?
Then you’re a muppet.
Now sit back down again.
The point behind this is that where your head goes your weight will follow as your hips shift under you and your balance is transferred.
This is why attacking the chest is important because attacking the chest will move the head, which will shift a person’s entire balance and destroy their equilibrium.
Using the hands
So let’s look at the principle of attacking the chest in action.
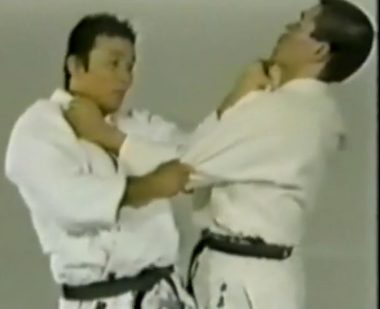
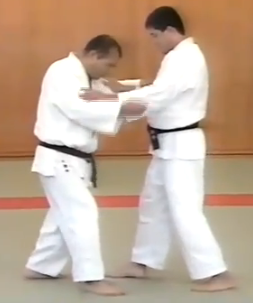
To properly attack the chest requires correct positioning of the tsurite arm as in the tsurikomi action this is one of the most poorly done, most misunderstood and abused kuzushi actions in Judo.
Your forearm must be against uke’s chest

And in the majority of throws you should seek to attack upwards towards uke’s chin.
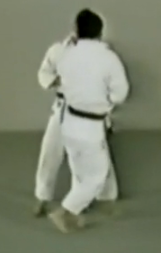
The number one error amongst beginners when trying to induce kuzushi for backwards techniques is to raise their elbow in the air in a chicken wing motion.
This is anatomically very poor for power transfer and normally in beginners has the effect of pushing the partner away from them rather than breaking their partner’s balance.
So the correct tsurite action for most backwards throws involves the forearm making sustained contact with uke’s chest.

The other critical hand action is the coordination of both the tsurite and the hikite hand. The two hands should work together in a smooth controlled action to effect kuzushi.
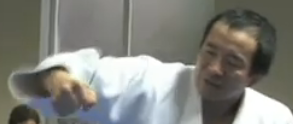
In this video Yamashita demonstrates and emphasises these two important principles attacking the chest with forearm contact and coordinating the actions of the tsurite and hikite hand.
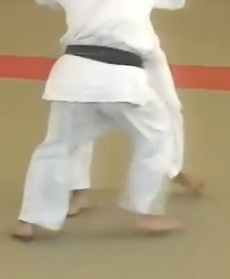
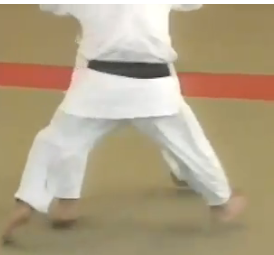
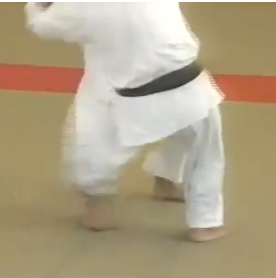
Sustained forearm contact is observable as a core component of balance breaking in all of the family of ‘gari’ techniques.
Ko uchi gari
Ko soto gari
O uchi gari
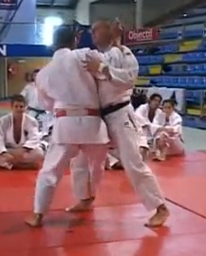
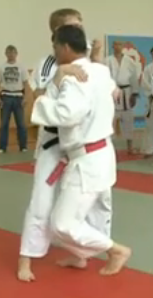
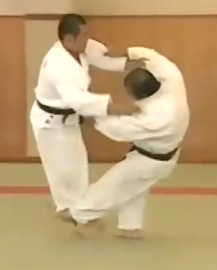
Chest to Chest
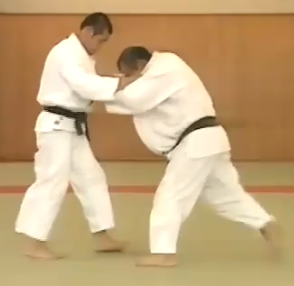
Along with correct and coordinated use of the hands a central component of balance breaking for backward throws is how tori positions his upper body.
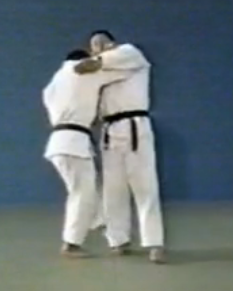
A common error is that tori has his body twisted too far so that it is perpendicular relative to uke’s body, like so:
Whilst its physically very difficult to keep your chest directly parallel to uke’s for throws like O uchi gari and Ko uchi gari, tori should endeavour to keep his chest as close to parallel with uke’s as possible.
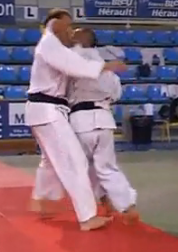
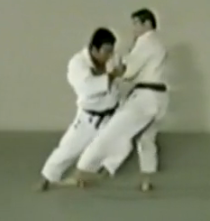
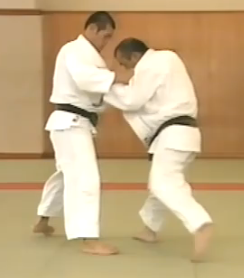
Here in an example of Ko uchi gari, tori has rotated his shoulders so that they’re roughly parallel to uke’s
Here in O uchi gari, tori has managed to achieve direct chest to chest contact whilst entering
Chest to chest contact is not a cast iron rule so much as it is an aide memoir for several key facets of effective balance breaking for backwards throws. The most important being that the impetus for the entry to the technique comes from the hips and that the hips of tori should be below those of uke.
Hips
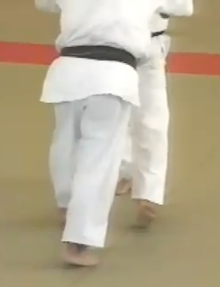
Another central mistake when entering for throws which is reflected in poor application of kuzushi, for backwards techniques, is that tori’s hips are above those of uke’s upon entry.
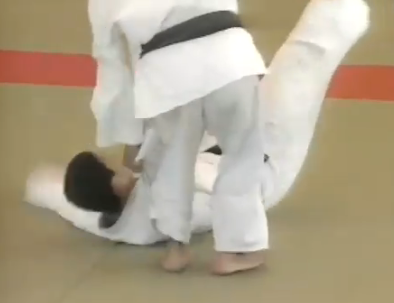
When attacking with a ‘gari’ technique it is pivotal that during the kuzushi and tsukuri phases to not only lower your own hips, but also to apply kuzushi in such a manner as to raise uke’s hips.
In this video Shozo Fujii demonstrates Ko uchi gari,
Fujii shows the utilisation of the tsurite to disrupt uke’s balance and shift uke’s weight onto his heels whilst raising his hips
Here he shows the positioning of his hips below those of uke
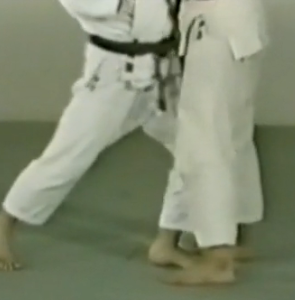
In a dynamic situation you see the full extent of the height differential between tori’s and uke’s hips
This principle is also reflected in:
Ko soto gari
O uchi gari
Positioning the hips below uke’s demonstrates not only correct application of kuzushi, but also that tori’s kuzshi and tsukuri was generated from the hips as a whole body action rather than merely from the upper body.
So when executing kuzushi for backwards throws and in particular those from the ‘gari’ family. It is vital to attack the chest using the correct tsurite action in order to shift way through affecting the positioning of the head, to achieve chest contact and to generate power from the hips in order to apply it in a concentrated whole body action to attack the chest.


