Thursday 28 April 2011

Sasae Tsurikomi Ashi


I think that Sasae tsurikomi ashi is one of the most underrated and overlooked throws in Judo, which is a shame, because it is a fantastic technique with which you can score massive ippons and create movement and openings for a whole host of throws. 

This is going to be a looser and less logical structure than I normally do, basically, because I couldn’t come up with a satisfactory structure.

Anyway without further ado, to business.

Offsetting

I have previously discussed the principle of offsetting for throws in my piece on O soto gari.

Offsetting as a principle is important to O soto gari, Sasae tsurikomi ashi and Hiza guruma and once you appreciate the principle of offsetting and start applying it in your uchikomi and randori you will see a dramatic improvement in your throwing. 

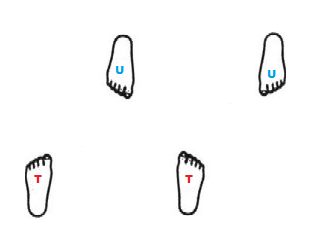
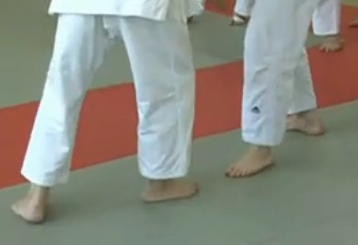
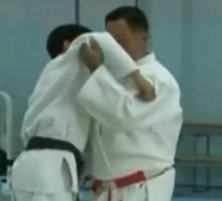
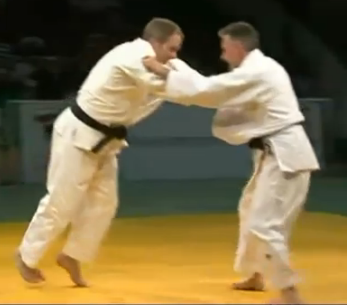
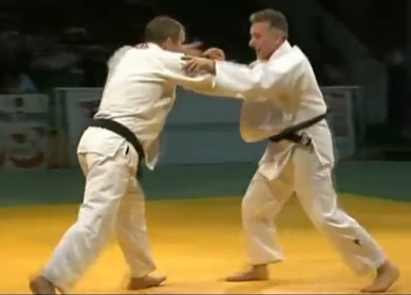
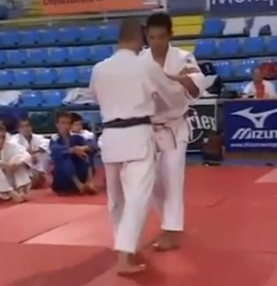
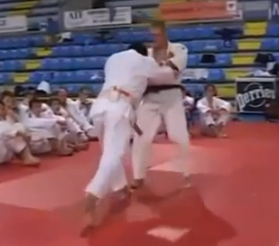
Normally in practice for uchikomi and nagekomi we start off with our feet parallel with our partners, like so:


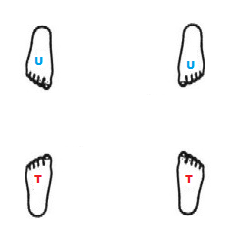
This is fine and correct for the majority of throws, however, starting off like this is the root cause of many structural problems with people's Sasae tsurikomi ashi.

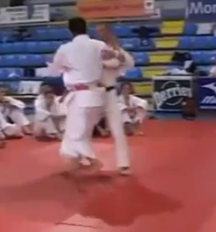
Starting off parallel means tori has to step diagonally to position himself for the throw.


The problem is that this means tori will lean back diagonally away from uke.


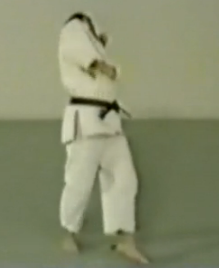
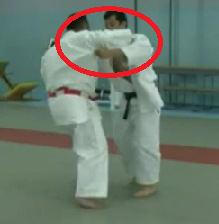
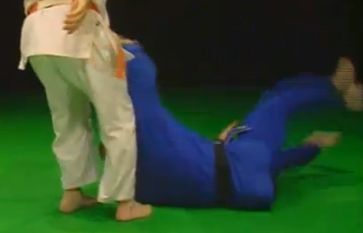
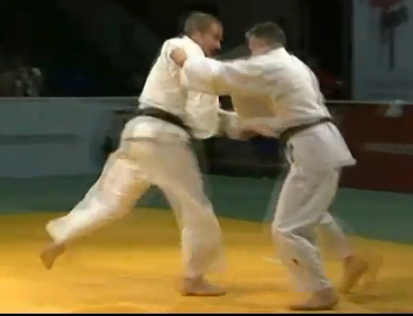
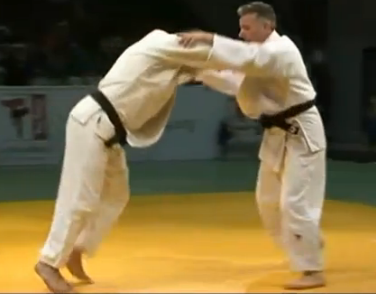
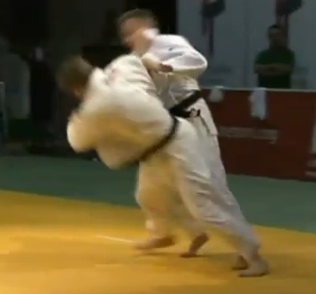
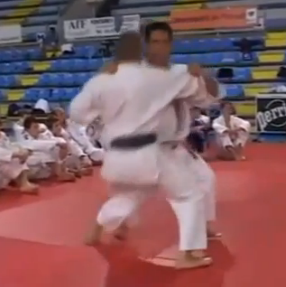
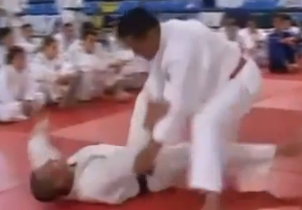
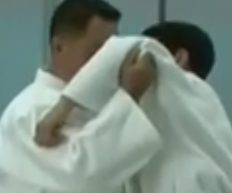
The result of practicing like this in uchikomi and nagekomi is that in randori your Sasae will look like this:


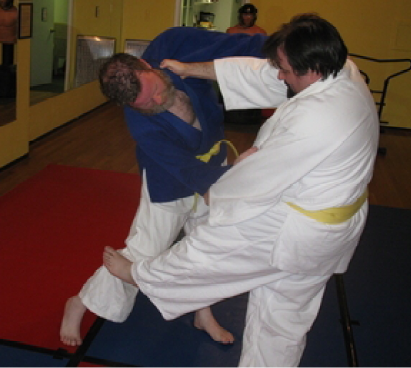
Your posture is wrecked, uke’s balance isn’t broken properly, you have no real control over uke and you either topple backwards or you get leg grabbed and thrown for ippon.


In Sasae tsurikomi ashi, and all Judo throws, keeping posture is vital. In Sasae tsurikomi ashi you should rotate your upper body, but have it remain basically straight.


So it’s crucial to offset yourself before you begin any uchikomi or nagekomi. 


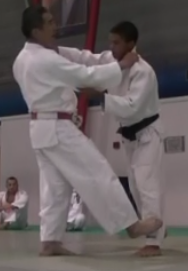
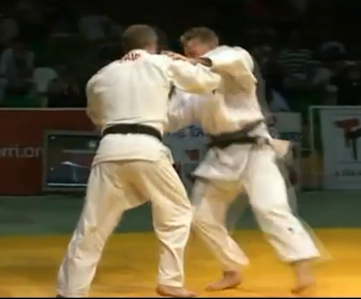
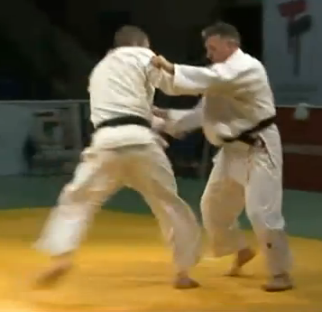
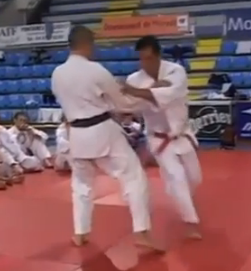
 Due to the importance of offsetting you frequently see Sasae tsurikomi ashi used and resulting in massive ippons when you have extreme right on right stances, in which the feet are naturally in the offset position.


Offsetting on the move

A lot of people and beginners especially struggle with Sasae in moving uchikomi and nagekomi mainly because the concept of offsetting hasn’t been explained to them, but also because those who have sort of sub consciously figured it out struggle to apply it on the move.

Once presented and explained, however, the process is relatively simple.

It is described here for a sleeve side Sasae, reverse the actions for a lapel side Sasae.

Tori begins retreating and when comfortable with the rhythm retreats with his left foot, assuming a right handed tori.


Tori then retreats his right foot in a backwards J type motion.


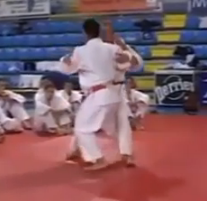
A visual example is presented below:


Timing

A common mistake and cause for throw failure when attacking with Sasae tsurikomi ashi is attacking the foot when it is already advanced and planted.


It’s very hard to throw uke when the foot is fully advanced unless uke is very unskilled or tori is very strong.

An analogy I like to use to explain the timing for Sasae is to imagine you’re carrying a big box so that you can’t see the floor. Whilst walking you stub your foot as you plant your foot and you stumble you may fall but it will be slow and you have a chance of recovery. However, if whilst walking you step and catch your foot as you’re stepping then you go absolute flying and break whatever’s in the box.

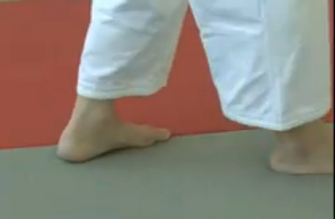
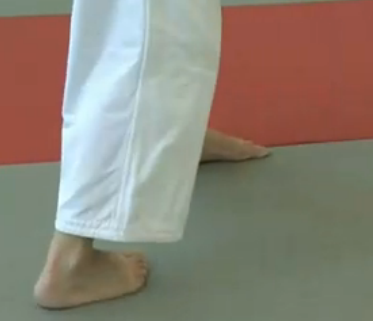
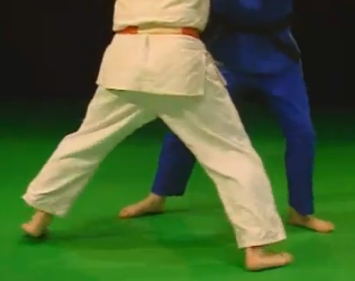
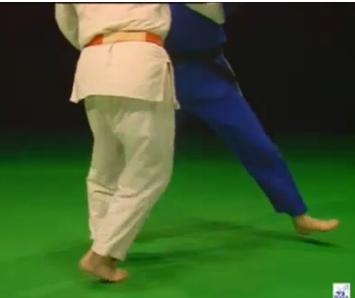
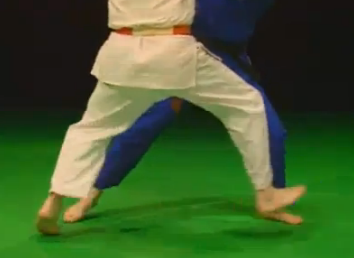
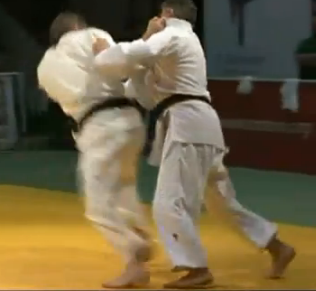
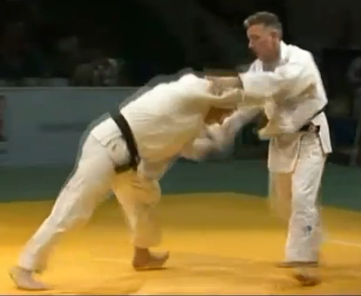
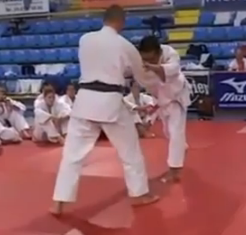
So in Sasae tsurikomi ashi you need to block uke’s foot as it meets the midway point, between being fully retreated


And fully advanced


You block uke’s foot as it advancing foot as it comes level with his planted foot


As uke is in the middle of transferring his weight, blocking the foot halfway through the movement will send uke flying.

Use of the hands

Part of Sasae tsurikomi ashi’s usefulness lies in the fact you can use it to both left and right without changing grips.

When performing Sasae to the sleeve side it is vital that you perform a correct, canonical tsurikomi action. The throw is after all, called, Sasae tsurikomi ashi.


This requires a smooth, strong and continual pull with the sleeve hand and good forearm contact on the chest with the tsurite hand. Lots of chest contact, ensuring the forearm fits into the pocket created by uke’s armpit.

When performing Sasae to the lapel side, which is more common, you have a choice of tsurite hand being in the traditional pocket position.


Or to have the elbow flared upwards


When performing Sasae to the lapel side the action on uke’s sleeve is vital to ensuring correct rotation and completion of the throw.

Tori must position his hand under uke’s elbow and drive it upwards and around in a strong wheeling action.


Combinations

One of the great things about Sasae is how many opportunities for breaking down defence, creating movement and creating throw opportunities it allows. Sasae can be used as a preparatory technique or combined with just about any forward throw, common ones are Tai otoshi, Seoi nage and Uchi mata.

However, due to a lack of quality video material demonstrating those combinations I will discuss Sasae and its ‘sister’ throw O soto gari and a combination I believe to be one of the best in the whole of Judo – Sasae tsurikomi ashi to Okuri ashi barai.

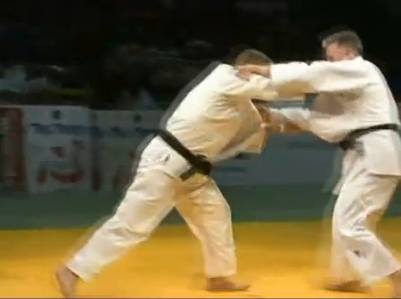
O soto gari and Sasae tsurikomi ashi are perfect partners because of how easy it is to link them in the action reaction sequence and how, when done properly both can elicit such massive reactions that make the subsequent action very easy and very powerful.

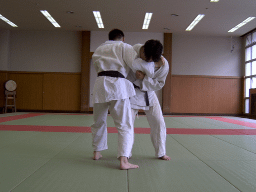
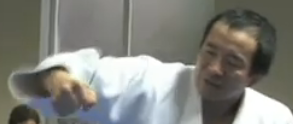
Katanishi outlines the action-reaction sequence


Yamashita adds further


And the video reversed to show how it would look for a right hander


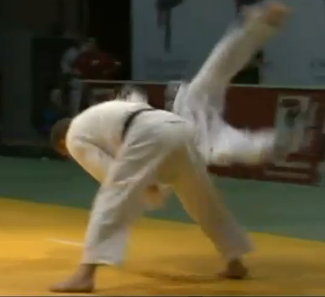
Sasae tsurikomi ashi to Okuri ashi barai is, for me, one of the most awesome combinations in Judo, because it combines two very difficult techniques that when done properly result in enormous ippons and rely on subtlety over brute force.

I have a mighty tally of one male white belt and one female brown belt that I have felled with this combination in randori. However, they hit the mat very hard and very unexpectedly that it knocked the wind out of both of them. That’s how powerful a combination in can be even in the hands of a spud like me.

In the combination tori attacks with Sasae and uke manages to step off or over it. To do this uke has to over extend the leg that has been attacked as part of the Sasae attempt and as such needs to bring his trailing leg to his advanced leg in order to regain his balance. It is this recovery action that is exploited and attacked with the Okuri ashi barai. 

As uke is still trying to recover balance and defences from the Sasae and this is a very uncommon and unexpected combination when you catch them with the Okuri ashi barai uke gets really launched.

This video demonstrates the movement pattern, tori doesn’t actually apply the Sasae but the stepping pattern is exactly the same. Note this combination is usually done with a lapel side Sasae as it makes the Okuri ashi barai easier.


Why not try and have a play with making your own combinations from Sasae tsurikomi ashi, however, remember to observe proper spacing and positioning

Hopefully that has given you some greater insight into a great, but underrated technique and has given you some ideas to improve your Sasae tsurikomi ashi.

Saturday 16 April 2011

Understanding the Judo ranking system


For those of you unfamiliar with Judo’s rank system it is divided into two sections. The Kyu grades called collectively in Japanese Mudansha and Dan called collectively in Japanese Yudansha.

There are normally 6 levels of kyu grade with 6th being the lowest and 1st being the highest.

Referred to in Japanese as:
Rokkyū – 6th kyu
Gokyū – 5th kyu
Yonkyū - 4th kyu
Sankyū - 3rd kyu
Nikyū - 2nd kyu
Ikkyu - 1st kyu

There are 10 levels of dan ranks with 1st being the lowest and 10th being the highest.

Referred to in Japanese as:
Shodan – 1st dan
Nidan  - 2nd dan
Sandan – 3rd dan
Yondan – 4th dan
Godan – 5th dan
Rokudan – 6th dan
Shichidan – 7th dan (Also called Nanadan)
Hachidan – 8th dan
Ku-dan – 9th dan
Jū-dan – 10th dan

6th dan and above are considered high grades and are sometimes referred to as Kohaku grades.

The Origins of the Kyu and Dan system:


The Kyu and Dan system was invented for the Japanese board game Go in the 17th century by Honinbo Dosaku, a grandmaster of the game, and is now widely used throughout many Japanese disciplines not just the martial arts, for instance, Ikebana or the art of flower arranging.

The kyu and dan system was also adopted by the Japanese school system and a black sash was used in swimming to denote advanced swimmers from novices.

Kano adopted the kyu and dan system in 1883 issuing two dan grades to Shiro Saigo (Sugata Sanshiro of Yama Arashi fame) and Tsunejiro Tomita. Kano's move was part to help integrate Judo into the Japanese education system as was his aim and to differentiate from Jujutsu which used certificates or licenses to rank.

Shoden (entry level), Chude (middle level ) and Okuden (“secret teachings”). Different levels could be also included in each major level to designate further achievement depending on the Jujutsu school, schools had between 3 and 5 total levels some stretched up to 9.

Normally these ranks weren't indicated on the gi in anyway, but plaques would hang on dojo walls indicating level with the owners name. Some Jujutsu schools used black sashes to indicate advanced practitioners and some Jujutsu schools such as Tenjin shin'yō ryū (Kano possessed Okuden in this ryu and Kito ryu) used different colour stitching and fabric on gi to indicate rank.

Kano's adoption of the kyu and dan system and abandonment of the certificate system was part of his attempt to set Judo apart from Jujutsu, which had developed a thuggish reputation during the 19th century.

Until 1886 no black belt was worn to indicate dan rank in Judo all practitioners wore a white sash which was a common practice in Jujutsu for average level students and as such some saw the Kodokan as an inferior school of Jujutsu. The black sash was introduced to indicate senior Judoka in time for the famous Tokyo metropolitan police contest between the Kodokan and Jujutsu schools.
The black belt as we recognise it today was introduced to Judo at the same time as the modern Judogi in 1907.

Finalising of the Dan system:


In 1931 Kano wrote that 6-9th dans were to wear a kohaku (red and white panels) obi and 10th to 12th dans were to wear a solid red obi. All others were to wear white.
For those of you who speak or read Japanese here is the original quotation:

"十段以上を紅帯とし、その以外は白帯とする帯は修行の段階に依って色を異にし、初段より五段ま を黒帯、六段より九段までを 紅白のだんだら、十段以上を赤帯とし、その以外は白帯 とする"

Kano thus specified that Judo would have 12 ranks, however, there was room left open for the possibility for more ranks which the quotation indicates would likely have worn a white belt. Other sources indicate that this would likely have been a double width white belt, presumable in order to distinguish it from a beginners white belt.

Upon Kano’s death this open ended 12 dan system was subsequently revised. As Kano only promoted up to 10th dan it was decided that no one could override Kano and so no rank higher than 10th dan would be awarded from the moment onwards. The belt colours were then altered from only 10th to 12th wearing a red belt to 9th to 10th dans  being able to wear a red belt and 6th to 8th dans being able to wear a kohaku belt. The standard belt for randori and day to day Judo activities remained black, however.

A mistranslated Kodokan pamphlet Q&A section contains a line indicating that the colour for 10th dan would be ‘purple’, however, this is a mistranslation from the Japanese into French and then French into English.

Coloured kyu belts:

The origins of coloured kyu belts are often believed to have originated with Mikinosuke Kawaishi. It should be noted also that contrary to popular belief Kawaishi did not study Jujutsu or Aikijujutsu or any other form of Koryu. He attended Himeij Middle School and then Waseda University, where he studied Judo and some Kendo. He was awarded shodan in Judo from the Dai Nippon Butokukai in February 1918, but his early Judo studies were in Himeji. He started at Waseda University in 1919, and in the following year enrolled at the Kodokan, where he became a 4th dan in 1924. He left Japan in 1926 for the US where he taught Judo and graduated from Columbia university. He then travelled the Amazon in Brazil before arriving in London in 1931 due to disagreements and a court case he left England for France in 1935 where he proceeded to fall out with more people.

Gunji Koizumi is actually the likely originator of the coloured kyu belt system, whilst teaching at the London Budokwai.

The coloured belts for Kyu grades as we now know them were instituted in 1927 at the Budokwai in London. Then it was decided that 5th kyus would wear a white belt, a 4th kyus would wear a yellow belt, a 3rd kyus would wear a green belt, a 2nd kyus would wear a blue belt, a 1st kyus would wear a a brown belt. It was later decided that the number of kyu grades would be expanded to 6 and so orange belt became 4th kyu, yellow 5th kyu and white 6th kyu.

In 1927 Kawaishi was still settling into life in America and would not reach France where he is normally supposed to have developed the coloured kyu grades until 1935. Budokwai minutes also detail that at the 9th annual Budokwai display in 1926 Baron Hayashi and Prince Chichibu under the guidance of Koizumi and Tani, Hayashi awarded 3 dan grades and "belts of various colours". So the Budokwai was issuing coloured kyu grade belts in 1926 the year Kawaishi left Japan and had codified their issue by 1927.

The probably reason that the origin of coloured kyu belts in Judo is attributed to Kawaishi is because he not only produced the famed Kawaishi method, by which techniques were numbered rather than named and so it was ease for people to conflate coloured kyu grade belts into the Kawaishi method. Also because the Budokwai was a private and clique organisation and there was little Judo teaching outside of the Budokwai. Whereas in France Judo was far more widespread under the likes of Aida Hikoichi and Ishiguro Keishichi and so when Kawaishi arrived in 1935, presumably bringing the Budokwai’s kyu belt system with him, it found a network of clubs nationwide which adopted the new belt practices and so became far wider spread and instituted in France than in England.

Japanese cultural origins of rank colours:

The colour white is associated with new life a.k.a beginnings through its association with womanhood and birth. This is why traditionally in Japan women have worn belts with a white stripe on them the joshi obi. White is also the funeral or Ososhiki colour in Japan so it's associated with endings. Hence why it was chosen to be both the beginning belt and the ultimate belt- 12th dan and above.

White is also associated with purity, pure intentions and honour, think Jita kyoei... This is why it is the colour of the Judogi and why in Japan it remains the only acceptable colour for Judogi with blue gi being tolerated in certain situations and dojo.

The colour red signifies happiness, the sun and completeness. The red belt signifies one who is complete or close to becoming complete in their mastering and/or knowledge of Judo. The kohaku obi shows that one is beginning the process of trying to accomplish becoming complete in Judo, the combination of white - beginning and red completeness.

The colour black being an absence of colour symbolizes emptiness, an absence of individualism and opening the mind and body to absorb knowledge and to "start a new chapter" in one's life. In Japan traditional wedding dress is black for the groom and guests. Black is considered a unique colour and shouldn't be combined with other colours except white.

The effects of Judo’s rank structure on martial arts


 Judo’s ranking system has been almost universally taken up by the other Gendai budo that emerged from Japan in the same period. In particular the notions of ‘kyu’ and ‘dan’ with variously coloured belts making up the ‘kyu’ or beginner grades and ‘black’ marking the transition into the ‘dan’ or advanced grades and with red symbolizing the top rank, have spread to pretty much every style of martial arts from Tae Kwon do to Brazilian Jiu Jitsu.

Indeed the effects of Judo’s rank system have spread beyond the confines of martial arts into the popular imagination. Where ‘the black belt’ has become associated with immense skill, wisdom, fighting prowess and overall deadliness. The black belt has become a symbol of mastery in popular culture to such an extent that the business management strategy Six Sigma issues the rank of ‘black belt’ to expert practicioners.

How modern dan ranks are awarded in Judo:


Dan ranks are issued by the national governing body (NGB) for Judo in each country and its affiliated organisations. The  NGB is always the recognised governing body for Judo by that nations Olympic committee. All national NGBs are members of continental unions – EJU, AJU, JUA, PJC and OJU. These continental unions are all members of the International Judo federation, IJF, which is recognised by the International Olympic Committee as the world governing body for Judo.  As well as each countries’ respective NGB and affiliates two other organisations issue dan ranks globally the IJF and the Kodokan. 

In national NGBs dan ranks from 1st to 5th dan are awarded either on the basis of contest results and technical exams or purely on technical exams.

Awards for 6th dan and above are generally given for advancement and understanding of the principles and philosophy of Judo, not for fighting prowess.

At present there are 6 legitimate Judo 10th dans worldwide. The Europeans; Henri Courtine of France, George Kerr of Great Britian and Jaap Nauwelaerts de Agé of Holland who have all been awarded 10th dan by their respective NGB. However, many consider the only ‘true’ 10th dans to be those issued by the Kodokan, the three current Kodokan 10th dan are pictured below.


(From L to R: Ichiro Abe -87- 10th dan, Yoshimi Osawa -83- 10th dan and Toshiro Daigo -84- 10th dan)

Wednesday 6 April 2011

Dynamic Delay


Before I start, I would like to say this has been one of most difficult of these articles to write. This is because it’s discussing a concept that is so broad in its application and so varied that trying to codify it into a single ‘doctrine’ or conceptual framework has proved very difficult. One of the main difficulties, for me, was coming up with a descriptively useful yet simultaneously concise definition of dynamic delay. The other was finding examples that showed the dynamic delay principle in isolation and not to open up to many rabbit holes the discussion or post to disappear down. I think and I hope, that I have managed to achieve that balancing act.

So without further ado, the fundamental Judo skill – Dynamic delay

"Dynamic delay is the process of controlled deceleration and subsequent acceleration by tori relative to uke’s constant motion."

It is easy for us to observe gradual and or obvious deceleration and acceleration, a car braking, Usain Bolt flying out of the blocks etc... However, what is harder for us to observe is sudden and momentary deceleration and acceleration and indeed one being a consequence of the other.

When seeking to explain and illustrate this principle it occurred to me that some of the clearest and most accessible examples come from outside the world of Judo and occur in team sports such as Rugby. In Judo often the action is concealed by the clothing of the two players and the myriad of minute adjustments and split second action. However, in a sport such as rugby with a lone figure in a wide open space with a clear view of the uncovered legs and feet it becomes more obvious. 

The most famous example of dynamic delay in team sports, to an Englishman, is rugby player Jason Robinson. Robinson has a truly exceptional life story a former alcoholic who found God and phenomenal form on the pitch. Who went on to cover himself in glory representing his county, succeed in both codes of Rugby and be blessed with a unique a special privileged amongst sportsmen – scoring the winning try in the final minutes of his last ever match for his club. However, it was his mastery of dynamic delay that is of interest to us today.


Here is some footage of Robinson using the principle of dynamic delay to slice through the French backline and score a phenomenal try from the set-piece, apologies to those reading from France.


What is useful to us from this footage, apart from the excellence of English rugby in comparison to France... Is that Robinson accelerates after catching the ball and then spotting the opportunity (debana?) in an opening of the French line very rapidly decelerates to a stand-still and re-accelerates to sprinting speed in a matter of fractions of a second. By his rapid deceleration and acceleration Robinson completely out manoeuvres the French defence whose speed, in tracking across the field, remains constant.


I’m sure those of you familiar with Football, Hockey, American football etc... can think of similar examples from those sports. And please do so, if it helps you wrap your head around the concept. As, I believe, presented as a purely Judo phenomenon devoid of kinesiological context makes it harder rather than easier to understand.

So now if we return to my earlier definition of dynamic delay as:

“The process of controlled deceleration and subsequent acceleration by tori relative to uke’s constant motion.”

And apply that to the Robinson video where Robinson is tori and the French defence uke. Then I think we can start to make some sense of the issue at hand.

Let’s examine this video of the dynamic delay being applied to Okuri ashi barai.

Dynamic delay Okuri ashi barai


Tori and uke start moving in tandem, level with one another.


Tori then decelerates and delays his own movement, allowing uke’s advancing foot to continue, whilst tori’s feet remain level with uke’s trailing foot


Uke’s advanced foot touches the mat and Tori then accelerates into his advancing step whilst uke’s speed of motion remains constant


This dynamic delay and subsequent acceleration by tori, whilst uke’s speed of motion remained constant combines with the accelerated and exaggerated step by tori. The result is that there is potential energy  loaded into tori’s trailing foot and it can accelerate much faster than uke’s trailing foot.


Tori’s foot, travelling faster than uke’s, makes contact with uke’s foot accelerating uke’s motion at a rate he is not prepared for.


Uke’s weight transfer process is disrupted by tori accelerating the trailing foot to a speed uke is unprepared for. Combined with a proportionate and appropriate kuzushi action tori disrupts uke’s weight transfer process in a way that is irrevocable and uke is thrown clean off their feet.


As regular readers will know I don’t favour this method of practicing Okuri ashi barai, precisely because it’s much harder for tori to control the dynamic delay process. It requires a very competent and intelligent uke to be fully accessible. However, if you apply the principles outlined in this post to my preferred method of Okuri ashi barai you will find they both rely on dynamic delay.

Dynamic delay is, however, not purely applicable to ashiwaza although that is where most people encounter it and it where most people struggle with it.


Dynamic delay for Tai otoshi


I have had to slow this video down twice as much as normal because Adams is just so fast.
Adams starts moving his uke


Adams then begins his dynamic delay sequence, he advances his left foot with an exaggerated forward step and visibly slows relative to his uke


Adams then brings his trailing right foot to his advanced left foot in a tsugi ashi type motion, coming soon on the blog, visibly slowing and pausing in a manner reminiscent of Robinson.


Adams then uses the impetus from the tsugi ashi action accelerates his left foot into position, whilst uke’s rate of motion remains constant.

Adams accelerates further as his trailing right foot advances to the point of the triangle uke’s rate of motion remains constant.

His trailing foot then spins his left into position and the advanced right foot shoots across for the Tai otoshi, accompanied by a strong, accomplished kuzushi action.

And the perfect ippon.


I have include two pieces of footage of Adams applying the dynamic delay principle to Tai otoshi after having dissected the first I will just leave a series of screen grabs for the second. I call this method of applying dynamic delay the stutter step, the reason should be obvious. This is a very common way of applying it for major forward throws on a retreating uke and can be used for the whole gamut of techniques – Uchi mata, Seoi nage, Harai goshi etc...


Dynamic delay for O uchi gari


There’s a slight miscommunication between Katanishi and his uke so we pick up the action with that miscommunication removed.

Katanishi advances with his left then suddenly decelerates allowing uke to continue retreating with his left despite Katanishi not advancing with his left.


He then advances with his right, cross stepping and placing it in front of uke’s right which is commencing its retreat.


Uke then continues his retreat whilst tori’s advanced right foot remains constant and tori’s trailing left foot accelerates to a position behind the right.


Tori then accelerates his advanced right foot to catch uke’s left foot as it is fully weighted.

Ippon


Seen from another angle


Hopefully now you have a fuller grasp of the process of dynamic delay, which I have defined as best I can as:

"The process of controlled deceleration and subsequent acceleration by tori relative to uke’s constant motion."

I’ll leave you with two examples of dynamic delay in action, not included in this piece to show the wide applicability of the principle. It is important to remember the definition and that this is a principle there is no one set method of achieving dynamic delay and all throws, players and situations can have their own methods.